


Fluorescence microscopy is a powerful technique that allows researchers to visualize specific molecules and structures within cells and tissues. To prepare samples for fluorescence microscopy, a cryostat microtome is often used to cut thin sections of frozen tissue. In this blog post, I'll share some insights on how to use a cryostat microtome for fluorescence microscopy, drawing on my experience as a Cryostat microtome supplier.
Understanding the Cryostat Microtome
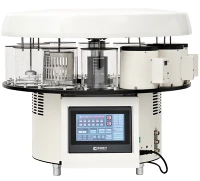
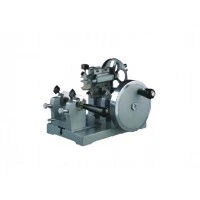
A cryostat microtome is a specialized instrument designed to cut thin sections of frozen tissue at low temperatures. It consists of a cutting blade, a specimen holder, and a temperature-controlled chamber. The low temperature helps to preserve the tissue structure and prevent the degradation of fluorescent molecules.


There are different types of cryostat microtomes available in the market. For instance, the Cryotome offers precise cutting capabilities, while the Cryostats Semi - Automatic provides a good balance between automation and user control. Our Cryostat Microtome combines advanced features to meet the diverse needs of researchers.
Preparing the Cryostat Microtome
Before using the cryostat microtome, it's essential to prepare the instrument properly. First, clean the cutting blade and the specimen holder to remove any debris or contaminants. Use a suitable cleaning solution and a soft brush to ensure a thorough cleaning.
Next, set the temperature of the cryostat chamber. The ideal temperature depends on the type of tissue being sectioned. Generally, a temperature between -18°C and -25°C is suitable for most tissues. Allow the cryostat to reach the set temperature before proceeding.
Preparing the Tissue Sample
The quality of the tissue sample preparation is crucial for successful fluorescence microscopy. Start by fixing the tissue in an appropriate fixative. For fluorescence microscopy, fixatives such as paraformaldehyde are commonly used as they preserve the fluorescent signals well.
After fixation, the tissue should be cryoprotected. This involves immersing the tissue in a cryoprotectant solution, such as sucrose, to prevent ice crystal formation during freezing. The tissue is then frozen in a suitable freezing medium, such as OCT compound.
Mounting the Tissue on the Specimen Holder
Once the tissue is frozen, it needs to be mounted on the specimen holder. Carefully place the frozen tissue block on the specimen holder and secure it using the appropriate mounting device. Make sure the tissue is centered and firmly attached to the holder to ensure accurate sectioning.
Setting the Sectioning Parameters
Before starting the sectioning process, set the sectioning parameters on the cryostat microtome. These parameters include the section thickness, cutting speed, and advance rate. The section thickness depends on the type of tissue and the requirements of the fluorescence microscopy experiment. For most applications, a section thickness of 5 - 10 micrometers is suitable.
The cutting speed and advance rate should be adjusted based on the hardness of the tissue. Softer tissues may require a slower cutting speed and a smaller advance rate, while harder tissues can tolerate a faster cutting speed.
Sectioning the Tissue
Once the parameters are set, start the sectioning process. Slowly advance the specimen holder towards the cutting blade. As the blade cuts through the tissue, thin sections will be produced. Use a fine brush or a section lifter to carefully transfer the sections onto a glass slide.
It's important to handle the sections gently to avoid damage. Make sure the sections are evenly distributed on the slide and do not overlap.
Fluorescent Staining of the Sections
After sectioning, the next step is to stain the sections with fluorescent dyes. There are various fluorescent dyes available for different applications, such as DAPI for nuclear staining and Alexa Fluor dyes for specific protein labeling.
Prepare the staining solution according to the manufacturer's instructions. Incubate the sections in the staining solution for the appropriate time. After staining, wash the sections thoroughly to remove any excess dye.
Mounting the Stained Sections
Once the sections are stained, they need to be mounted on a coverslip. Use a suitable mounting medium that is compatible with the fluorescent dyes. Place a drop of the mounting medium on the stained sections and carefully lower the coverslip onto the slide, avoiding the formation of air bubbles.
Imaging the Sections
Finally, the stained sections are ready for fluorescence microscopy. Place the slide on the microscope stage and adjust the focus and magnification to visualize the fluorescent signals. Use the appropriate filters to detect the different fluorescent dyes.
Troubleshooting and Tips
- Section Quality: If the sections are wrinkled or torn, check the cutting blade for dullness or damage. A sharp blade is essential for producing high - quality sections.
- Fluorescent Signal: If the fluorescent signal is weak, check the staining protocol. Make sure the staining time and dye concentration are appropriate. Also, ensure that the sections are not over - washed, as this can reduce the fluorescent signal.
- Temperature Control: Maintain a stable temperature in the cryostat chamber throughout the sectioning process. Fluctuations in temperature can affect the quality of the sections.
Contact for Purchase and Consultation
If you're interested in purchasing a cryostat microtome for your fluorescence microscopy needs, or if you have any questions regarding its use, feel free to reach out to us. Our team of experts is ready to assist you in finding the right instrument for your research.
References
- Histology: A Text and Atlas by Michael H. Ross and Wojciech Pawlina.
- Fluorescence Microscopy: Principles, Techniques, and Applications by Richard P. Haugland.