


Hey there! If you're in the field of neuroscience or any related area that involves studying brain tissue, you've probably come across the need to cut thin sections of brain tissue. And one of the most reliable tools for this task is a Cryostat microtome. As a supplier of these amazing machines, I'm here to share with you how to cut sections of brain tissue using a Cryostat microtome.
Getting Ready
First things first, you need to make sure you have all the necessary equipment and materials. Besides the Cryostat Microtome, you'll need some embedding medium, like OCT (Optimal Cutting Temperature) compound. This stuff helps to hold the brain tissue in place and makes it easier to cut. You'll also need some clean glass slides to mount the sections on.
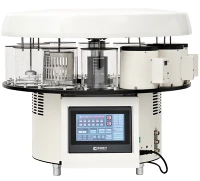
Before you start, it's important to set up the Cryostat microtome properly. You need to make sure the temperature is set correctly. The ideal temperature for cutting brain tissue usually ranges from -18°C to -22°C. This cold temperature helps to keep the tissue firm and makes it easier to get thin, even sections. You can adjust the temperature on the Cryostat Microtome With Touch Screen easily using its user - friendly interface.
Preparing the Brain Tissue
Once the Cryostat is at the right temperature, it's time to prepare the brain tissue. Take your brain sample and place it in a small mold. Then, pour the OCT compound over the tissue. Make sure the tissue is completely covered and oriented in the way you want it to be cut. You can use a toothpick or a small spatula to adjust the position of the tissue.
After that, put the mold with the tissue and OCT compound into the Cryostat. Let it freeze for a while. This usually takes around 15 - 20 minutes, but it can vary depending on the size of the tissue sample. You'll know it's ready when the OCT compound is solid and the tissue is firmly embedded.
Loading the Tissue onto the Microtome
Now that your tissue is frozen and ready, it's time to load it onto the Cryostat microtome. Open the specimen holder on the microtome. Carefully take the frozen tissue block out of the mold and place it in the specimen holder. Make sure it's securely in place.
Next, you'll need to attach a blade to the microtome. There are different types of blades available, but for cutting brain tissue, a sharp disposable blade usually works best. Follow the instructions on the microtome to properly install the blade.
Setting the Cutting Parameters
Before you start cutting, you need to set the cutting parameters. This includes the thickness of the sections you want to cut. For brain tissue, a common thickness is around 10 - 20 micrometers. You can adjust the thickness setting on the Cryotome.
You also need to set the cutting speed. A slower speed is usually better for getting high - quality sections. You can experiment a bit to find the speed that works best for your tissue and blade.
Cutting the Sections
Once you've set the parameters, it's time to start cutting. Turn on the microtome and let it start making sections. As the blade cuts through the tissue, you'll see thin sections come out. You can use a small brush to gently lift the sections off the blade and place them on the glass slides.
It's important to be patient and keep an eye on the cutting process. If you notice any issues, like the sections not coming out evenly or the tissue tearing, you may need to adjust the cutting parameters or check the blade.
Mounting and Storing the Sections
After you've cut the sections, you need to mount them on the glass slides. You can use a mounting medium to attach the sections to the slides. Make sure the sections are flat and there are no air bubbles.
Once the sections are mounted, you can store them in a slide box in a freezer. This will keep the sections in good condition until you're ready to use them for further analysis, like staining or microscopy.
Troubleshooting
Sometimes, things don't go as smoothly as we'd like. Here are some common problems and how to fix them:
Sections are too thick or too thin: If the sections are too thick, you can decrease the thickness setting on the microtome. If they're too thin, increase the setting.
Tissue is tearing: This could be due to a dull blade. Replace the blade with a new one. It could also be that the tissue is not frozen enough. Put it back in the Cryostat for a bit longer.
Sections are wrinkled: This might be because the cutting speed is too fast. Slow down the cutting speed and try again.
Why Choose Our Cryostat Microtomes
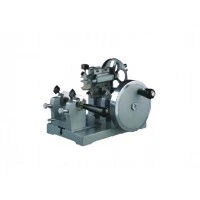
As a supplier of Cryostat microtomes, we offer high - quality machines that are designed to make your life easier. Our Cryostat Microtome With Touch Screen has a user - friendly interface that allows you to easily set the temperature, cutting thickness, and speed. The Cryotome is also very reliable and can produce consistent, high - quality sections.
If you're in the market for a Cryostat microtome, we'd love to have a chat with you. Whether you're a research lab, a university, or a medical facility, we can provide the right equipment for your needs. Contact us to start a conversation about your requirements and let's see how we can help you get the best results in your brain tissue cutting experiments.


References
- Principles of Microtomy. (Author unknown). Some general guidelines on using microtomes in biological research.
- Cryostat Operation Manual. (Our company's manual). Detailed instructions on operating our Cryostat microtomes.