


Hey there! As a supplier of tissue processors, I often get asked about how to replace the key components of these machines. It's an important topic, especially for those who rely on these devices in their daily work. In this blog post, I'll walk you through the process step by step, sharing some tips and tricks along the way.


Why Replace Key Components?
Before we dive into the replacement process, let's quickly talk about why you might need to replace key components in the first place. Over time, wear and tear can take a toll on your Tissue Processor Machine. Components like pumps, valves, and heaters can degrade, leading to reduced performance or even complete breakdowns. By replacing these parts regularly, you can ensure that your tissue processor continues to operate at its best, providing accurate and reliable results.
Identifying the Key Components
The first step in replacing key components is to identify which parts need to be replaced. This can vary depending on the make and model of your tissue processor. Some common key components include:
- Pumps: These are responsible for moving fluids through the system. If you notice a decrease in fluid flow or hear unusual noises coming from the pump, it might be time for a replacement.
- Valves: Valves control the flow of fluids and gases within the tissue processor. A faulty valve can cause leaks or improper fluid distribution.
- Heaters: Heaters are used to maintain the temperature of the processing fluids. If the temperature is inconsistent or not reaching the desired level, the heater may need to be replaced.
- Filters: Filters help to remove contaminants from the fluids. Clogged filters can restrict fluid flow and affect the quality of the processed tissues.
Preparing for the Replacement
Once you've identified the components that need to be replaced, it's time to prepare for the replacement process. Here are some steps to follow:
- Gather the necessary tools: Depending on the component you're replacing, you may need tools such as wrenches, screwdrivers, and pliers. Make sure you have all the tools you need before you start.
- Read the manufacturer's instructions: Every tissue processor is different, so it's important to read the manufacturer's instructions carefully before attempting any repairs or replacements. This will ensure that you follow the correct procedures and avoid causing any damage to the machine.
- Order the replacement parts: Contact your tissue processor supplier or the manufacturer directly to order the replacement parts. Make sure you provide them with the make, model, and serial number of your machine to ensure you get the correct parts.
- Turn off the machine: Before you start working on the tissue processor, make sure it's turned off and unplugged from the power source. This will prevent any electrical shocks or accidents.
Replacing the Components
Now that you're prepared, it's time to start replacing the components. Here's a general guide on how to replace some of the most common key components:
Replacing a Pump
- Locate the pump: The pump is usually located on the side or back of the tissue processor. Refer to the manufacturer's instructions to find the exact location.
- Disconnect the hoses: Use a wrench or pliers to loosen the hose clamps and disconnect the hoses from the pump. Be careful not to spill any fluids.
- Remove the pump: Use a screwdriver or wrench to remove the bolts or screws that hold the pump in place. Carefully lift the pump out of the machine.
- Install the new pump: Place the new pump in the same position as the old one and secure it with the bolts or screws. Reconnect the hoses and tighten the hose clamps.
- Test the pump: Plug in the tissue processor and turn it on. Check for any leaks or unusual noises. If everything seems to be working properly, you're good to go.
Replacing a Valve
- Locate the valve: Valves are typically located along the fluid lines. Refer to the manufacturer's instructions to find the specific valve that needs to be replaced.
- Isolate the valve: Close the valves on either side of the faulty valve to prevent fluid from flowing through it.
- Remove the valve: Use a wrench or pliers to loosen the nuts or bolts that hold the valve in place. Carefully remove the valve from the fluid line.
- Install the new valve: Place the new valve in the same position as the old one and tighten the nuts or bolts. Open the valves on either side of the new valve to allow fluid to flow through it.
- Test the valve: Turn on the tissue processor and check for any leaks or improper fluid flow. If the valve is working correctly, you're done.
Replacing a Heater
- Locate the heater: The heater is usually located inside the fluid reservoir. Refer to the manufacturer's instructions to find the exact location.
- Disconnect the power supply: Before you start working on the heater, make sure the tissue processor is turned off and unplugged from the power source. Locate the power cord or wiring connected to the heater and disconnect it.
- Remove the heater: Use a screwdriver or wrench to remove the bolts or screws that hold the heater in place. Carefully lift the heater out of the fluid reservoir.
- Install the new heater: Place the new heater in the same position as the old one and secure it with the bolts or screws. Reconnect the power supply.
- Test the heater: Plug in the tissue processor and turn it on. Check the temperature of the processing fluids to make sure the heater is working properly.
Replacing a Filter
- Locate the filter: Filters are usually located along the fluid lines or inside the fluid reservoir. Refer to the manufacturer's instructions to find the specific filter that needs to be replaced.
- Isolate the filter: Close the valves on either side of the filter to prevent fluid from flowing through it.
- Remove the filter: Use a wrench or pliers to loosen the nuts or bolts that hold the filter in place. Carefully remove the filter from the fluid line.
- Install the new filter: Place the new filter in the same position as the old one and tighten the nuts or bolts. Open the valves on either side of the new filter to allow fluid to flow through it.
- Test the filter: Turn on the tissue processor and check for any leaks or reduced fluid flow. If the filter is working correctly, you're finished.
Post-Replacement Checks
After you've replaced the key components, it's important to perform some post-replacement checks to ensure that everything is working properly. Here are some things to check:
- Leaks: Check all the connections and hoses for any signs of leaks. If you notice any leaks, tighten the connections or replace any damaged parts.
- Fluid flow: Make sure the fluids are flowing properly through the system. Check the fluid levels and ensure that there are no blockages in the hoses or filters.
- Temperature: If you replaced the heater, check the temperature of the processing fluids to make sure it's within the desired range.
- Functionality: Run a test cycle on the tissue processor to ensure that it's functioning correctly. Check the processed tissues for any signs of damage or improper processing.
Conclusion
Replacing the key components of a tissue processor may seem like a daunting task, but with the right tools, knowledge, and preparation, it can be done safely and effectively. By following the steps outlined in this blog post, you can keep your tissue processor in top condition and ensure that it continues to provide accurate and reliable results.
If you have any questions or need further assistance with replacing the key components of your tissue processor, don't hesitate to reach out. As a tissue processor supplier, we're here to help you every step of the way. Whether you're looking for replacement parts or need advice on maintenance and repairs, we've got you covered.
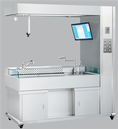
Check out our Kuohai Medical KH-TD Spin Tissue Processor (vacuum Option) and Tissue Processor Histology products for high-quality tissue processing solutions. If you're interested in purchasing a new tissue processor or have any inquiries about our products, feel free to contact us. We look forward to working with you!
References
- Manufacturer's manuals for tissue processors
- Industry best practices for tissue processor maintenance and repair