


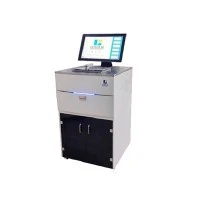

Hey there! As a supplier of Cryostat microtomes, I've got a ton of experience in this field. Today, I'm gonna share with you how to cut sections with a specific angle using a Cryostat microtome.
First off, let's talk a bit about what a Cryostat microtome is. A Cryostat Microtome is an essential tool in many scientific and medical labs. It's used to cut thin sections of frozen tissue samples for microscopic examination. These sections are crucial for things like diagnosing diseases, studying cell structures, and conducting research.
Now, let's get into the nitty - gritty of cutting sections at a specific angle.


Preparing the Sample
Before you start cutting, you need to prepare your tissue sample properly. The sample should be frozen to the right consistency. If it's too soft, the sections will be difficult to cut cleanly, and if it's too hard, the blade might break or the sections could shatter.
-
Embedding the Sample:
- First, you'll need to embed the tissue in an embedding medium like OCT (Optimal Cutting Temperature) compound. This helps to hold the tissue in place during the cutting process.
- Place the tissue in a small mold and pour the OCT compound over it. Make sure the tissue is fully submerged and oriented in the way you want it to be cut.
- Then, put the mold in the Cryostat to freeze the sample. This usually takes a little while, depending on the size of the sample.
-
Mounting the Sample on the Microtome:
- Once the sample is frozen, take it out of the mold and mount it on the specimen holder of the Cryotome. Make sure it's firmly attached so that it doesn't move during cutting.
Setting the Angle
Now, here's where the magic of cutting at a specific angle comes in.
-
Adjusting the Angle:
- Most Cryostat microtomes have a mechanism to adjust the cutting angle. On some Cryostat Microtome With Touch Screen models, you can simply input the desired angle on the touch - screen interface.
- For other models, you may need to use a dial or a lever to set the angle. It's important to be precise here. A small error in the angle can lead to inaccurate sections.
- Before you start cutting, double - check the angle setting to make sure it's correct. You can use a protractor or a built - in angle indicator on the microtome to verify.
-
Blade Selection and Installation:
- The type of blade you use can also affect the quality of the angled sections. For cutting at an angle, a sharp and high - quality blade is essential.
- Install the blade carefully according to the manufacturer's instructions. Make sure it's properly aligned and tightened so that it cuts smoothly.
Cutting the Sections
Once you've prepared the sample and set the angle, it's time to start cutting.
- Initial Cuts:
- Start with a few test cuts. This will help you to see if the angle is correct and if the sections are coming out as expected.
- Slowly advance the specimen towards the blade using the microtome's feed mechanism. The speed of the feed should be adjusted according to the type of tissue and the desired thickness of the sections.
- Collecting the Sections:
- As the sections are cut, they will come off the blade. You can use a paintbrush or a special section - collecting device to pick up the sections and place them on a glass slide.
- Make sure to handle the sections gently to avoid damaging them.
Troubleshooting
Sometimes, things don't go as planned. Here are some common problems and how to fix them:
- Rough or Jagged Sections:
- This could be due to a dull blade. Replace the blade with a new one and see if the problem persists.
- It could also be that the sample is not frozen to the right consistency. Adjust the freezing time or temperature.
- Sections Not Cutting at the Right Angle:
- Double - check the angle setting on the microtome. Make sure there are no mechanical issues with the angle adjustment mechanism.
- If the problem still exists, it might be a calibration issue. Contact the manufacturer or a technical support person for assistance.
Maintenance of the Cryostat Microtome
To ensure that your Cryostat microtome continues to cut sections at the right angle, regular maintenance is essential.
- Cleaning:
- After each use, clean the microtome thoroughly. Remove any tissue debris from the blade and the specimen holder.
- Use a suitable cleaning solution to wipe down the surfaces of the microtome.
- Lubrication:
- Check the moving parts of the microtome and lubricate them as recommended by the manufacturer. This will keep the microtome running smoothly and ensure accurate angle cutting.
In conclusion, cutting sections with a specific angle using a Cryostat microtome requires careful preparation, precise angle setting, and proper cutting techniques. With the right equipment and a bit of practice, you can achieve high - quality angled sections for your research or diagnostic needs.
If you're in the market for a Cryostat microtome or need more information about our products, don't hesitate to reach out. We're here to help you with all your microtome needs and ensure that you get the best results.
References
- Histology textbooks for general knowledge on tissue sectioning.
- Manufacturer's manuals for Cryostat microtomes for specific operating instructions.