




As a dedicated supplier of Glass Coverslipper, I understand the importance of maintaining the quality and cleanliness of these essential laboratory tools. Glass coverslips are used in a wide range of scientific applications, from microscopy to cell culture, and their cleanliness can significantly impact the accuracy and reliability of experimental results. In this blog post, I will share some effective methods and best practices for cleaning glass coverslips, ensuring that they remain in optimal condition for your research needs.


Why Clean Glass Coverslips?
Before delving into the cleaning process, it's crucial to understand why cleaning glass coverslips is necessary. Over time, coverslips can accumulate various contaminants, including dust, grease, fingerprints, and biological residues. These contaminants can interfere with the clarity of the sample being observed under the microscope, leading to distorted or inaccurate images. Additionally, unclean coverslips can introduce unwanted substances into cell cultures, potentially affecting cell growth and viability. By regularly cleaning your glass coverslips, you can ensure that they provide a clear and unobstructed view of your samples, thereby enhancing the quality of your research.
Preparing for Cleaning
Before you begin the cleaning process, it's important to gather all the necessary materials and prepare your workspace. Here's a list of items you'll need:
- Cleaning Solution: You can use a mild detergent or a specialized glass cleaner. Avoid using harsh chemicals that may damage the glass or leave residues.
- Distilled Water: Distilled water is recommended to prevent the introduction of impurities that could contaminate the coverslips.
- Soft Brushes or Swabs: These can be used to gently remove stubborn contaminants from the surface of the coverslips.
- Cleaning Container: A shallow container or a petri dish can be used to hold the coverslips during the cleaning process.
- Tweezers or Forceps: These tools are essential for handling the coverslips without leaving fingerprints or other marks.
- Lint-Free Cloths or Paper Towels: These can be used to dry the coverslips after cleaning.
Cleaning Methods
There are several methods you can use to clean glass coverslips, depending on the level of contamination and the specific requirements of your application. Here are some common cleaning methods:
Method 1: Soaking in Cleaning Solution
- Prepare the Cleaning Solution: Fill a cleaning container with a sufficient amount of cleaning solution. Make sure the solution is well-diluted to avoid damaging the coverslips.
- Place the Coverslips in the Solution: Use tweezers or forceps to carefully place the coverslips in the cleaning solution. Make sure they are fully submerged.
- Soak the Coverslips: Allow the coverslips to soak in the cleaning solution for at least 15-30 minutes. This will help to loosen and dissolve any contaminants on the surface of the coverslips.
- Gently Agitate the Solution: Periodically, gently agitate the cleaning solution to ensure that all surfaces of the coverslips are thoroughly cleaned.
- Rinse the Coverslips: After soaking, remove the coverslips from the cleaning solution and rinse them thoroughly with distilled water. Make sure to remove all traces of the cleaning solution.
- Dry the Coverslips: Use a lint-free cloth or paper towel to gently dry the coverslips. Make sure they are completely dry before using them.
Method 2: Ultrasonic Cleaning
- Prepare the Ultrasonic Cleaner: Fill the ultrasonic cleaner with a sufficient amount of cleaning solution. Make sure the solution is appropriate for use in an ultrasonic cleaner.
- Place the Coverslips in the Cleaner: Use tweezers or forceps to carefully place the coverslips in the ultrasonic cleaner. Make sure they are fully submerged.
- Set the Cleaning Parameters: Set the ultrasonic cleaner to the appropriate frequency and time settings. The specific settings will depend on the type of ultrasonic cleaner and the level of contamination.
- Start the Cleaning Process: Start the ultrasonic cleaner and allow it to run for the specified period of time. The ultrasonic waves will create tiny bubbles that will help to dislodge and remove contaminants from the surface of the coverslips.
- Rinse the Coverslips: After the cleaning process is complete, remove the coverslips from the ultrasonic cleaner and rinse them thoroughly with distilled water. Make sure to remove all traces of the cleaning solution.
- Dry the Coverslips: Use a lint-free cloth or paper towel to gently dry the coverslips. Make sure they are completely dry before using them.
Method 3: Manual Cleaning
- Prepare the Cleaning Solution: Fill a cleaning container with a sufficient amount of cleaning solution. Make sure the solution is well-diluted to avoid damaging the coverslips.
- Wet the Coverslips: Use tweezers or forceps to carefully place the coverslips in the cleaning solution. Make sure they are fully wet.
- Gently Clean the Coverslips: Use a soft brush or swab to gently clean the surface of the coverslips. Pay special attention to any areas with stubborn contaminants.
- Rinse the Coverslips: After cleaning, remove the coverslips from the cleaning solution and rinse them thoroughly with distilled water. Make sure to remove all traces of the cleaning solution.
- Dry the Coverslips: Use a lint-free cloth or paper towel to gently dry the coverslips. Make sure they are completely dry before using them.
Best Practices for Cleaning Glass Coverslips
In addition to using the appropriate cleaning methods, there are several best practices you can follow to ensure the effective and efficient cleaning of glass coverslips:
- Handle the Coverslips with Care: Always use tweezers or forceps to handle the coverslips to avoid leaving fingerprints or other marks.
- Clean the Coverslips Regularly: Regular cleaning can prevent the accumulation of contaminants and ensure the long-term quality of the coverslips.
- Use Distilled Water: Distilled water is recommended to prevent the introduction of impurities that could contaminate the coverslips.
- Avoid Using Harsh Chemicals: Harsh chemicals can damage the glass or leave residues, so it's best to use mild detergents or specialized glass cleaners.
- Dry the Coverslips Completely: Make sure the coverslips are completely dry before using them to prevent the formation of water spots or other marks.
- Store the Coverslips Properly: Store the coverslips in a clean and dry environment to prevent contamination.
Automated Glass Coverslipper Cleaning
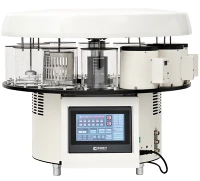
For laboratories with high-volume cleaning requirements, Automated Glass Coverslipper cleaning systems can provide a convenient and efficient solution. These systems use advanced technology to automate the cleaning process, ensuring consistent and reliable results. Automated cleaning systems can save time and labor, while also reducing the risk of human error.
Conclusion
Cleaning glass coverslips is an essential step in maintaining the quality and accuracy of scientific research. By following the methods and best practices outlined in this blog post, you can ensure that your glass coverslips remain in optimal condition for your research needs. Whether you choose to use manual cleaning methods or automated cleaning systems, regular cleaning and proper handling of glass coverslips are key to achieving reliable and reproducible experimental results.
If you have any questions or need further information about cleaning glass coverslips or our Glass Coverslipper products, please feel free to contact us. We are committed to providing high-quality products and excellent customer service to meet your laboratory needs.
References
- [1] Microscopy: A Laboratory Manual. Edited by David L. Spector, Robert D. Goldman, and Louise A. Leinwand. Cold Spring Harbor Laboratory Press, 1998.
- [2] Cell Culture: A Laboratory Handbook. Edited by John R. W. Masters. John Wiley & Sons, 2000.
- [3] Glassware Cleaning and Sterilization. American Society for Microbiology, 2018.